

Hot-weather non-shrink grouting requires more than checking the afternoon air temperature. Direct sun can heat bagged material, steel baseplates, concrete foundations, mixers, hoses, and water well above the shaded air temperature. Low humidity and wind can also remove moisture rapidly from exposed grout. Together, these conditions may shorten working time, reduce flow retention, interrupt placement, and make early curing more difficult.
A successful plan controls the temperature of the entire grouting system—from storage through curing—while keeping the approved water content unchanged. This article provides a practical framework for cementitious grout beneath machinery and equipment baseplates. The project’s approved method statement and the selected product’s current technical data sheet remain the controlling documents.
What Counts as Hot Weather for Grouting?
There is no single air-temperature number that defines every hot-weather risk. ACI 305R-20 explains that high ambient temperature, high concrete temperature, low relative humidity, solar radiation, and wind can combine to accelerate cement hydration and surface moisture loss. A windy, dry day can therefore demand stricter controls than a hotter but calm and humid day.
ACI 305R-20 applies to hydraulic-cement concrete in general, not to every proprietary grout. Use its environmental principles for planning, but let the grout manufacturer’s declared limits control the job.
For a broader introduction to material selection and normal installation, first review our non-shrink grout selection, mixing and installation guide.
Why Hot-Weather Non-Shrink Grouting Needs Extra Control
Higher material and substrate temperatures can accelerate hydration. A batch may lose flow sooner, leaving less time to fill a long baseplate without interruption. High temperature can also affect water demand and test results.
The main field risks are:
- Shorter working time: grout can stiffen before the cavity is completely filled.
- Reduced flow retention: a mix that passes the initial flow check may no longer travel the required distance later.
- Faster surface drying: exposed shoulders may lose moisture before curing protection is installed.
- Greater temperature variation: a hot steel plate, shaded concrete, and cooled grout can create uneven conditions.
- More difficult logistics: frequent small batches may be necessary while continuous placement must still be maintained.
- Unrepresentative test specimens: cubes stored in direct sun may not reflect the specified test-curing condition.
“Non-shrink” is not permission to ignore these variables. ASTM C1107/C1107M-26 classifies packaged hydraulic-cement grout through defined test procedures and conditions. Field performance still depends on water, temperature, preparation, placement, and curing.
Use Product-Specific Temperature Limits
Product data illustrates why a universal limit is unsafe. For example, the U.S. data for SikaGrout-212 lists a product-temperature range of 65–75°F (18–24°C) and states that temperatures above 73°F (23°C) reduce pot life and flow. By contrast, SikaGrout-4316 is marketed for placement up to 100°F (38°C), while still recommending that storage and mixing produce grout close to 70°F (21°C).
Those values apply only to those products and markets; they are not QD60 specifications. Obtain the current data sheet for the exact product and destination market, then confirm:
- permitted ambient, substrate, water, powder, and mixed-grout temperatures;
- working time and flow retention at the expected temperature;
- minimum and maximum application thickness;
- approved water range and consistency;
- aggregate-extension rules, if applicable;
- curing method and duration;
- strength required before loading;
- special instructions for pumping or long flow distances.
Build a Hot-Weather Grouting Plan Before the Pour
Do not wait until the mixer is running to decide how to cool materials or protect fresh grout. The approved plan should assign responsibilities and define objective hold points.
| Control Item | What to Plan | Evidence to Record |
|---|---|---|
| Weather | Forecast air temperature, humidity, wind, cloud cover, and likely solar exposure | Forecast and actual readings |
| Material storage | Shaded, dry, ventilated storage off the ground | Bag and storage-area temperature |
| Mixing water | Clean supply within the product’s approved temperature range | Water temperature and quantity per batch |
| Substrate and steel | Shade, preconditioning, SSD preparation where required | Concrete and baseplate temperatures |
| Production | Mixer capacity, batch size, labor, backup power, and standby mixer | Trial production rate and batch log |
| Placement | Headbox, flow direction, vents, pump or bucket route, and leak response | Pre-pour inspection |
| Curing | Materials installed immediately after finishing | Start time and curing method |
| Stop-work limits | Product or project temperature, flow, delay, and equipment criteria | Named person authorized to stop work |
Where practical, schedule the pour for a cooler stable period. Also confirm lighting, labor, delivery, curing supervision, and whether the substrate or steel still retains heat.
1. Store Powder and Equipment Under Shade
Keep unopened bags dry, shaded, and off hot ground. Rotate stock so approved, in-date batches are used in sequence.
Shade mixers, hoses, water containers, forms, and the work area. If equipment is rinsed or cooled, remove uncontrolled water before production so it cannot alter the batch.
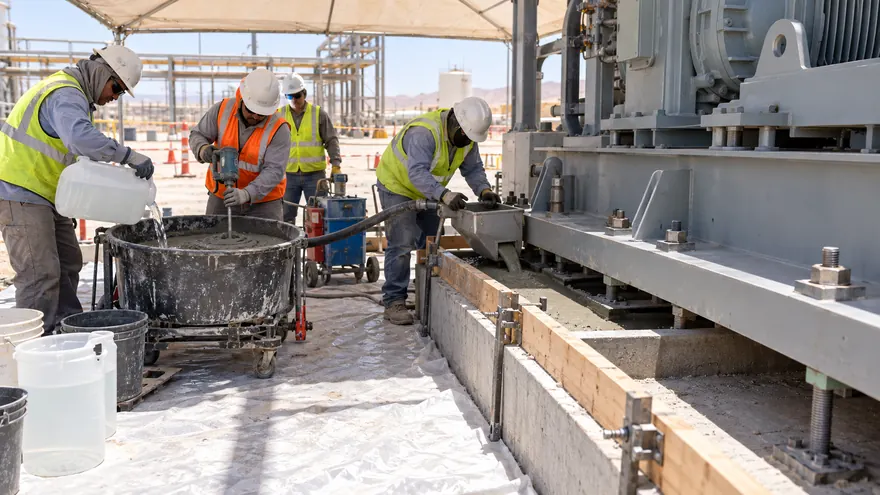
Measure temperatures rather than judging them by touch. Use suitable calibrated instruments and record readings at the frequency defined by the quality plan.
2. Condition Mixing Water Without Changing the Water Dose
Cool mixing water can help control mixed-grout temperature when the product manufacturer permits it. Store water in clean, covered, shaded containers and protect it from contamination. The required water quantity must still remain within the approved range for the selected consistency.
Do not add extra water to recover flow or make a hot batch easier to place. Extra water changes the designed formulation and may affect segregation, bleeding, strength, and volume stability. Do not place ice directly into the mixer unless the manufacturer and approved method explicitly define how the ice is measured as part of the total mixing water and confirm that it will fully melt.
Target the approved grout temperature, not the coldest possible mix.
3. Shade and Prepare the Foundation and Baseplate
Install shade early enough to reduce solar heating, not only when mixing starts. Measure the concrete substrate and steel baseplate, because both may be substantially hotter than the air.
Prepare concrete by removing laitance, weak material, dust, oil, curing compounds, and other bond inhibitors. Where the cementitious grout instructions require saturated surface-dry concrete, pre-wet for the stated period and remove all standing water before placement. Do not use uncontrolled surface water as a cooling method.
Forms must be rigid, braced, and leak-tight. Hot-weather placement already has a limited working window; a leaking form or blocked vent can turn a manageable pour into an interruption.
4. Verify Production Rate With a Trial
Estimate the production rate needed to keep the grout front moving. Compare it with the real output of the mixer, transfer route, pump, and crew.
Use our non-shrink grout quantity calculation method to estimate the total volume, but verify that the article is live at this slug before activating the link. Then perform a trial using the actual equipment and expected temperature range when the project risk justifies it.
Balance smaller batches against the need for continuous supply. Provide backup power or equipment where a stoppage could create a cold joint.
5. Measure Every Batch and Reject Nonconforming Grout
Record the product lot, powder temperature, water quantity, water temperature, mixed-grout temperature, mixing time, flow or consistency, and placement time. Use the test methods and acceptance limits in the approved quality plan.
Do not add water when flow falls or retemper stiffened grout unless current written instructions expressly permit it. Reject or formally disposition any batch outside approved temperature, time, or consistency limits.
6. Place Continuously From One Side
Coordinate mixing and placement so grout enters from one side and advances as a single front toward the open outlet or vent. Maintain the specified head without creating excessive turbulence. Keep the opposite side open until sound, uncontaminated grout emerges.

Do not place independently from several sides to save time; meeting flow fronts can trap air. Use pumps, straps, rodding, or vibration only when approved for the selected material. Monitor form movement, leaks, grout level, flow, and elapsed time continuously.
Avoid unnecessary exposed shoulders. Large unconfined areas lose moisture quickly and can be more vulnerable to early cracking. Follow the engineer’s shoulder detail and remove or shape forms only at the approved time.
7. Start Curing Protection Immediately
Prepare curing materials before mixing the first batch. Once the exposed grout can accept protection without surface damage, apply the product-specified wet curing, moisture-retaining covering, curing compound, or combined system.
Windbreaks, shade, damp coverings, and plastic sheeting can limit rapid evaporation. An ACI technical answer on hot-weather curing notes that high evaporation during water curing can itself contribute to cracking through evaporative cooling and identifies plastic cover sheets as one way to reduce evaporation. For grout, the exact curing sequence must still follow the selected product data and project detail.
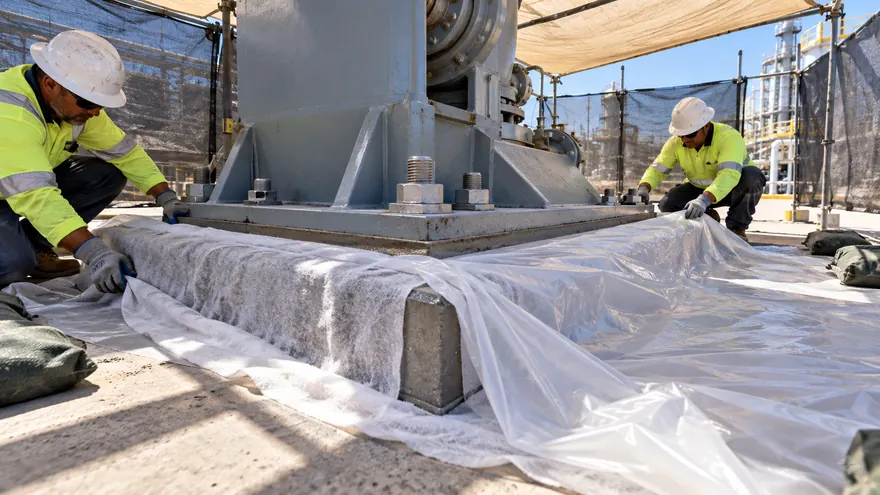
Keep coverings secure but avoid damage to fresh shoulders. Do not direct a high-pressure water stream onto young grout. Maintain protection against sun, wind, impact, vibration, and rain for the specified period.
8. Protect Quality-Control Specimens
Field samples can mislead if left in direct sun, allowed to dry, or cured differently from the approved procedure. Prepare, identify, store, and transport them as specified.
Record specimen temperature and curing conditions. Equipment loading should depend on the required verified strength and other acceptance criteria—not simply on elapsed time or a hard-looking surface.
When Should Hot-Weather Grouting Stop?
Pause the operation before mixing, or stop under the approved contingency plan, when:
- ambient, substrate, material, water, or mixed-grout temperature is outside the approved range;
- measured flow or flow retention fails the acceptance limit;
- the crew cannot maintain continuous placement;
- the grout has exceeded its working time;
- water measurement or temperature-control equipment fails;
- formwork leaks, moves, or loses the required head;
- an outlet or vent becomes blocked;
- curing materials or supervision are unavailable;
- wind, dust, sun, or an unexpected weather change defeats the planned controls.
Name the person authorized to reject a batch or postpone the pour, and define how the engineer and supplier will be contacted.
Hot-Weather Grouting Checklist
Before Mixing
- Confirm the current approved technical data sheet and safety data sheet.
- Review product-specific temperature, water, flow, and working-time limits.
- Verify the weather forecast and actual site readings.
- Shade powder, water, mixer, pump, forms, substrate, and steel.
- Confirm bag quantity, lot numbers, shelf life, and dry storage.
- Complete substrate, SSD, formwork, headbox, and vent inspections.
- Stage calibrated thermometers, water measures, timers, and test equipment.
- Prepare curing materials, windbreaks, backup power, and contingency contacts.
During Mixing and Placement
- Measure water for every batch.
- Record material, water, substrate, and mixed-grout temperatures.
- Follow the approved addition sequence and mixing time.
- Check flow or consistency at the required frequency.
- Do not add unauthorized water or retemper stiffened material.
- Maintain a continuous one-side pour and visible outlet.
- Reject batches outside approved limits.
After Placement
- Begin the specified curing system promptly.
- Keep exposed grout shaded and protected from wind.
- Secure damp coverings or plastic without damaging the surface.
- Protect and document field specimens correctly.
- Maintain temperature and curing records.
- Load equipment only after documented acceptance.
Frequently Asked Questions
What Temperature Is Too Hot for Non-Shrink Grout?
There is no universal air-temperature limit. Use the selected product’s permitted ambient, substrate, material, and mixed-grout temperatures together with project requirements. Humidity, sun, and wind can create high drying risk even when air temperature appears acceptable.
Can I Add Ice to Non-Shrink Grout?
Only if the grout manufacturer and approved method explicitly allow it and count the melted ice as part of the total mixing water. Unmeasured ice can change water content and may not melt uniformly. Chilled clean water is often simpler, but it also must stay within the product instructions.
Does Cold Water Allow More Mixing Water?
No. Water temperature and water quantity are separate controls. Use only the approved amount needed for the specified consistency.
Can I Restore Flow by Adding Water Later?
Do not retemper unless the current product instructions expressly permit it. A batch that has lost acceptable flow, exceeded working time, or moved outside the temperature limit should be handled through the approved rejection procedure.
Should Grout Be Cured Longer in Hot Weather?
Use the product-specific curing method and duration. Hot, dry, or windy conditions may require more robust protection against moisture loss, but the article cannot assign a universal number of curing days to every grout.
When Can the Equipment Be Started?
After the grout reaches the engineer’s required strength and satisfies all other acceptance criteria. High temperature can accelerate early setting without guaranteeing that the required in-place performance has been achieved.
Conclusion
Reliable hot-weather non-shrink grouting comes from controlling the whole system, not from adding extra water. Define product-specific limits, schedule intelligently, shade and condition materials, measure temperatures and water for every batch, maintain continuous one-side placement, and begin curing protection without delay.
For equipment foundations, review the published properties of QD60 grouting material and the broader Qiandao Materials product range. The live QD60 page lists flow and strength data but does not publish a complete hot-weather installation envelope, so obtain the current project-specific technical documentation before finalizing the method statement. Send the grout volume, gap, flow distance, expected temperatures, placement method, and loading schedule through our contact page for technical discussion.
References
- American Concrete Institute. ACI 305R-20, Guide to Hot Weather Concreting. 2020.
- American Concrete Institute. Are Any Temperature Limitations Necessary in Curing Concrete in Hot Weather?. Technical FAQ; accessed October 8, 2026.
- ASTM International. ASTM C1107/C1107M-26, Standard Specification for Packaged Dry, Hydraulic-Cement Grout (Nonshrink). Updated September 15, 2026; accessed October 8, 2026.
- Sika Corporation. SikaGrout-212 Product Page. Product-specific temperature, pot-life, and flow information; accessed October 8, 2026.
- Sika Corporation. SikaGrout-4316 Product Page. Product-specific hot-weather and mixed-temperature guidance; accessed October 8, 2026.
Image Upload Sheet
Featured Image
- Filename:
hot-weather-non-shrink-grouting-featured.webp - ALT: Hot-weather non-shrink grouting beneath an equipment baseplate under shade
- Title: Hot-Weather Non-Shrink Grouting Guide
- Caption: Shade, measured water, temperature monitoring, and continuous placement help control hot-weather grouting.
- Description: Industrial equipment baseplate being grouted under a shade canopy during hot sunny weather.
- Recommended Use: Set as the WordPress featured image; do not insert it again at the top when the theme displays featured images automatically.
Body Image 1
- Filename:
grout-material-temperature-control.webp - ALT: Technician checks shaded grout bags and mixing-water temperatures before hot-weather grouting
- Insert After: “Store Powder and Equipment Under Shade”
Body Image 2
- Filename:
continuous-hot-weather-grout-placement.webp - ALT: Crew maintains continuous one-side grout placement under shade in hot weather
- Insert After: “Place Continuously From One Side”
Body Image 3
- Filename:
hot-weather-grout-curing-protection.webp - ALT: Technicians protect freshly placed grout with damp curing fabric and plastic sheeting
- Insert After: “Start Curing Protection Immediately”
Internal Link Map
| Anchor Text | Destination | Purpose |
|---|---|---|
| non-shrink grout selection, mixing and installation guide | https://qdmaterials.com/non-shrink-grout-guide/ | Current technical pillar article |
| non-shrink grout quantity calculation method | /calculate-non-shrink-grout-quantity/ | Companion article; activate only after publication at this slug |
| QD60 grouting material | https://qdmaterials.com/product/qd60-grouting-material-for-precast-rebar-connection/ | Relevant product page |
| Qiandao Materials product range | https://qdmaterials.com/products/ | Product hub |
| contact page | https://qdmaterials.com/contact/ | Conversion page |
Related Articles Module
- Non-Shrink Grout: Selection, Mixing and Installation
- How to Calculate Non-Shrink Grout Quantity Correctly
- Wind Turbine Grout: Design, Selection and Installation Guide
- Non-Shrink Grout vs. Concrete Repair Mortar: When to Use Which?
Related Products Module
- QD60 Grouting Material for Precast Rebar Connection and Equipment Foundations