
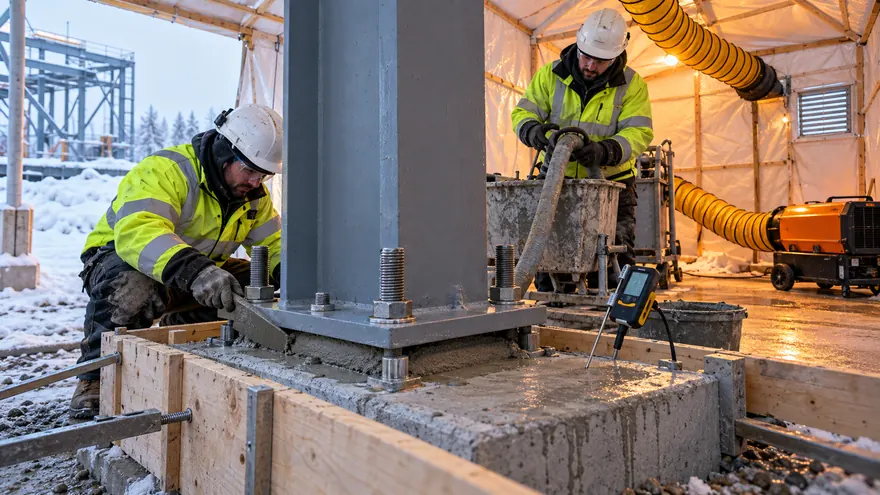
Cold weather can slow cement hydration, delay setting and expose fresh grout to freezing before it develops adequate strength. Successful cold-weather non-shrink grouting therefore depends on more than warming a few bags or adding hot water. The crew must control the temperature of the foundation, steel, materials, mixing water, fresh grout and curing environment as one coordinated system.
This guide explains how to plan that system for cementitious non-shrink grout beneath baseplates and machinery. It supports, but does not replace, the current product data sheet, project specification, engineer’s instructions or a site-specific method statement. Start with our complete non-shrink grout guide if you need a broader overview of grout selection and installation.
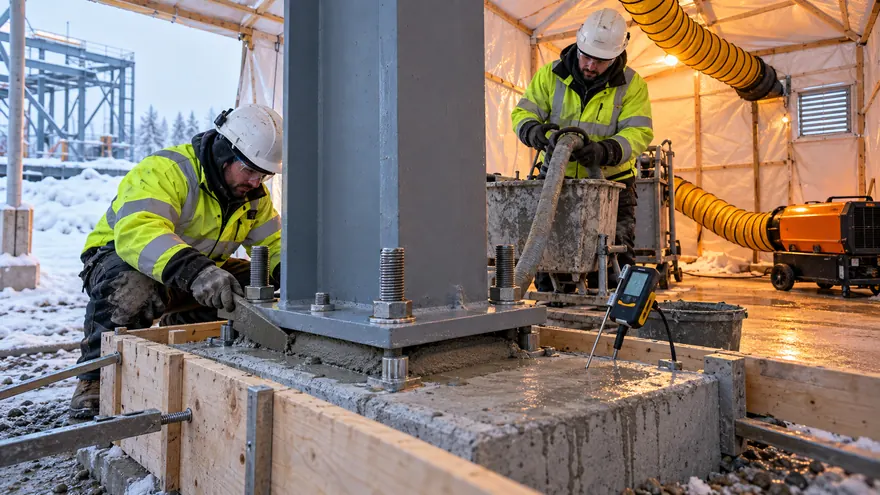
What Counts as Cold-Weather Non-Shrink Grouting?
ACI 306R-16 defines cold-weather concreting as concrete operations when the air temperature has fallen to, or is expected to fall below, 40°F (4°C) during the protection period. That is a useful planning trigger, but it is a concrete-industry definition—not a universal installation limit for every packaged grout.
The actual grout limits come from the named product’s current technical literature and the project specification. For example, the published data for SikaGrout-4316 lists an application range of 35–100°F (2–38°C) and gives product-specific protection requirements. Those figures apply to SikaGrout-4316; they should not be copied to another formulation.
For QD Materials projects, confirm the current technical documentation for the selected product—including QD60 grouting material—before approving the winter method statement. If the required limits are unavailable, contact the supplier and engineer rather than inventing a site rule.
Why Low Temperature Changes Grout Performance
Cementitious grout needs liquid water and sufficient temperature for hydration. As temperature falls, setting and strength development generally slow. If fresh material freezes too early, ice formation can disrupt its internal structure and compromise the intended support.
Cold-weather failures are rarely caused by air temperature alone. Common contributors include:
- frozen or frost-covered concrete that prevents sound contact;
- an ice film or condensation beneath the baseplate;
- bags stored in an unheated container and mixed while deeply chilled;
- water temperature selected without checking the resulting grout temperature;
- extra mixing water added to restore flow after a slow placement;
- open forms or uncontrolled drafts that cool edges faster than the grout core;
- abrupt removal of heat and insulation; and
- loading equipment before in-place grout strength has been verified.
ACI 306R describes four broad objectives for cold-weather concrete: prevent early freezing, obtain the required strength, maintain curing conditions and limit rapid temperature changes. The same risk-control logic is valuable for cementitious grout, while the grout manufacturer’s limits remain controlling.
Build the Cold-Weather Plan Before the Pour
Do not wait for the mixer to start before deciding how to heat and protect the work. A reliable cold-weather non-shrink grouting plan begins with a pre-pour review covering the forecast, enclosure, heat source, ventilation, material storage, backup equipment, temperature instruments, curing duration and acceptance criteria.
| Control point | Pre-pour decision | Evidence to record |
|---|---|---|
| Product | Approved grout and current data sheet | Batch/lot and document revision |
| Weather | Forecast through placement and protection | Air-temperature forecast |
| Enclosure | Windproofing, safe access and ventilation | Inspection and photographs |
| Materials | Dry, conditioned bag storage | Bag/storage temperature |
| Surfaces | Concrete and steel within product limits | Surface readings at several points |
| Mixing | Water range, batch size and mixing time | Water and fresh-grout temperature |
| Placement | Headbox, vents, crew and backup mixer | Start/finish time and batch log |
| Protection | Heat, insulation, sensors and alarm plan | Time-temperature record |
| Release | Required strength or engineer approval | Test results and sign-off |
ACI 306R advises having cold-weather plans and protective materials ready before freezing conditions develop. A spare heater, generator, thermometer and insulating blanket can prevent a controlled pour from becoming an emergency.
1. Enclose and Warm the Work Area Safely
An enclosure should block wind and precipitation while providing enough room to mix, place, inspect and cure the grout. Stabilize the environment before surface preparation and continue protection for the product- or project-specified period.
Use indirect heating where practical, distribute warm air rather than aiming concentrated heat at one spot, and protect tarps and combustibles from hot equipment. Direct flame can create local overheating, fire risk and combustion products; it is not a suitable shortcut for thawing a grout surface.
Temporary heat is also a life-safety issue. OSHA 29 CFR 1926.154 requires adequate ventilation for temporary heating devices and special care in confined spaces. OSHA also warns that fuel-burning equipment can generate carbon monoxide in enclosed or semi-enclosed areas and recommends effective ventilation and CO alarms in its winter weather guidance. Follow the heater manufacturer’s clearances and applicable local fire rules.
2. Condition Grout, Water and Equipment
For consistent cold-weather non-shrink grouting, keep unopened bags dry, off the ground and within the storage conditions on the data sheet. A heated enclosure works best when the bags have enough time to reach a stable temperature; briefly warming the air around deeply chilled bags is not equivalent to conditioning the powder.
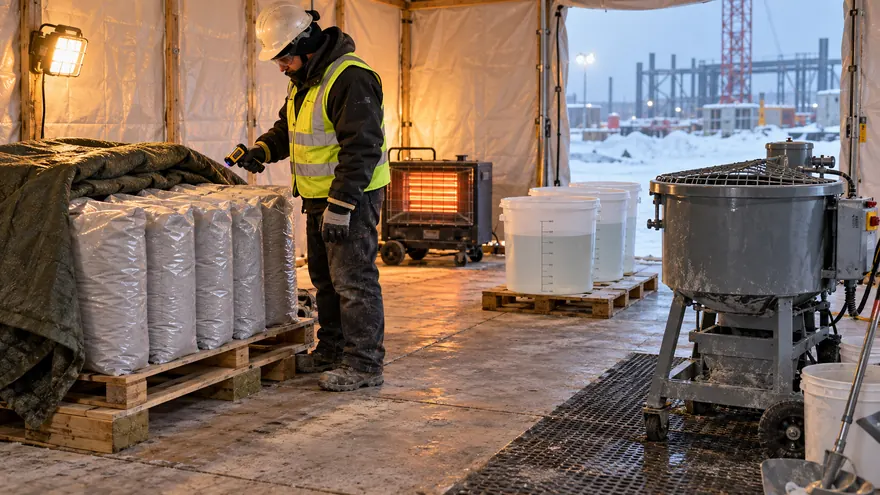
Use clean, potable mixing water in the quantity permitted by the product. The water may need controlled warming to produce fresh grout within the specified temperature range, but warmer is not automatically better. Sika’s cold-weather bulletin for cementitious grouts, for example, discusses conditioning bags and warming mixing water while limiting water temperature for its covered products. Treat those values as manufacturer guidance for those products, not a universal recipe.
Warm mixers, pumps and hoses if required, then remove rinse water completely before batching. Residual water changes the designed water-to-powder ratio. Measure each water dose; never use additional water as a field accelerator or as a cure for lost flow.
3. Remove Frost, Ice and Standing Water
Concrete must be sound and prepared to the specified profile. Steel bearing surfaces should be clean, and the grout space must be free of debris, snow, frost and ice. Inspect hidden corners, anchor-bolt pockets and the underside of the plate—not just the exposed foundation edge.
If the product requires a saturated-surface-dry substrate, achieve that condition without leaving puddles. In cold weather, uncontrolled pre-wetting can refreeze or create an ice film. The timing and method must therefore be part of the approved procedure.
Record surface temperatures with a suitable instrument at multiple points. Air temperature alone does not prove that a massive foundation or steel plate is ready; both can remain colder than the enclosure for hours.
4. Seal Forms and Plan Continuous One-Side Placement
Forms must be rigid, leak-resistant and sealed at the foundation. Provide the product-specified head pressure and vents so air can escape. Verify that the pour path is open before mixing begins.
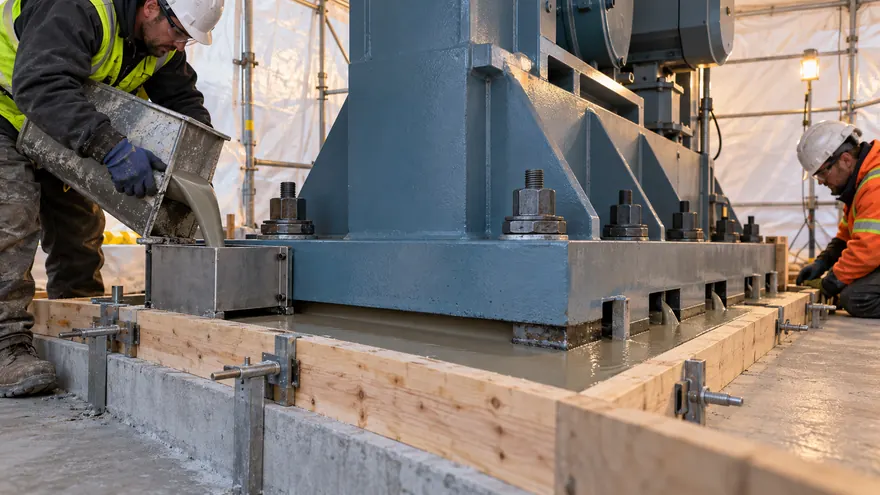
For typical baseplate work, place continuously from one side toward the opposite side. This helps drive air outward instead of trapping it beneath the plate. Do not pour independently from several sides unless the approved method specifically calls for it.
Cold weather may lengthen the set, but it does not grant unlimited working time. Organize crew, batch size, mixer capacity and delivery route around the product’s stated working time. Do not retemper stiffening grout with water. Stop if a mixer, pump or heater failure makes continuous compliant placement impossible.
5. Measure Every Batch Instead of Guessing
At minimum, the quality log should capture:
- ambient and enclosure temperatures;
- concrete and steel surface temperatures;
- bag or storage temperature when required;
- mixing-water temperature and quantity;
- fresh-grout temperature for each batch;
- mixing start, discharge and placement times; and
- sensor locations and curing temperatures.
Use calibrated or checked instruments and define who can authorize adjustments. Never add antifreeze, calcium chloride, accelerator or another admixture unless the grout manufacturer and project engineer explicitly approve it. An improvised additive can alter flow, expansion, strength, corrosion risk and compliance with the specified performance standard.
If the project specifies ASTM C1107/C1107M, remember that it is a performance specification for packaged dry hydraulic-cement grout. It does not replace the manufacturer’s field temperature instructions or the project’s cold-weather protection plan.
6. Protect, Cure and Cool Gradually
Begin the approved curing and protection procedure immediately after finishing. Keep edges, corners and exposed grout covered; these small sections lose heat fastest. Maintain the required environment with insulation and controlled heating, while preventing heater exhaust or concentrated hot air from drying the surface.
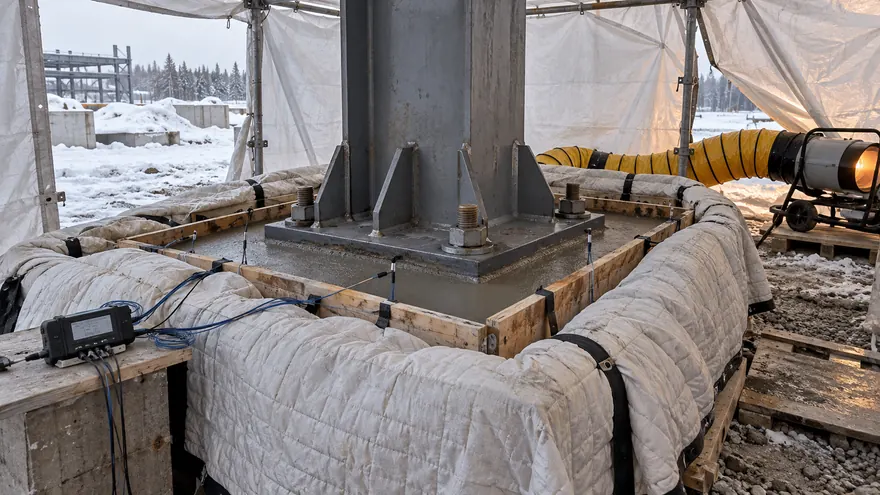
Place temperature sensors where they reveal the coldest credible conditions, not only beside the heater. For a substantial placement, that may include the perimeter, beneath or adjacent to the plate, and the surrounding enclosure. Use a data logger or a documented manual schedule, with an alarm and response plan for power or heater failure.
Avoid rapid cooling when protection ends. A gradual temperature transition reduces thermal shock and damaging temperature differentials. Do not strip forms, remove blankets, tighten anchors, align machinery or apply service loads merely because a calendar interval has passed. Release the installation against the strength or acceptance criteria established in the project documents.
ACI 306R notes a 500 psi (3.5 MPa) early-freezing criterion for properly proportioned concrete under certain conditions. Separately, the SikaGrout-4316 data sheet gives a different, product-specific freeze-protection strength. Neither figure is a universal release criterion for all non-shrink grouts. Use the requirement assigned to the actual product and application.
When Should the Crew Stop?
Pause or postpone the pour when any essential control cannot be demonstrated. Typical stop-work triggers include:
- foundation, plate or materials outside the approved temperature range;
- frost, ice, snow or standing water in the grout space;
- unstable enclosure temperature or uncontrolled drafts;
- unsafe heater clearance, inadequate ventilation or a CO alarm;
- missing calibrated temperature equipment;
- insufficient conditioned material for continuous placement;
- incorrect water dose or fresh-grout temperature;
- failed mixer, pump, heater or backup power; or
- no credible way to protect and monitor the grout for the required period.
A delayed pour is usually cheaper than removing unsupported, frozen or noncompliant grout.
Cold-Weather Grouting Checklist
Before mixing
- Confirm the current product data sheet, specification and approved method statement.
- Review the forecast for the entire protection period.
- Stabilize the enclosure and verify safe ventilation and heater clearances.
- Condition sealed grout bags and measured mixing water.
- Remove snow, frost, ice, debris and standing water.
- Check substrate, steel and material temperatures.
- Seal forms, install the headbox and confirm vent paths.
- Prepare spare heat, power, instruments and insulating materials.
During mixing and placement
- Measure water accurately and follow the stated mixing sequence and time.
- Record fresh-grout temperature for every batch.
- Place continuously from the approved side with adequate head.
- Watch vents and discharge edge for steady grout arrival.
- Do not add water or unapproved admixtures.
- Keep doors closed as practical without compromising ventilation or escape.
After placement
- Start the specified curing method immediately.
- Insulate vulnerable edges and maintain controlled heat.
- Log temperatures at the approved locations and frequency.
- Respond immediately to heater, power or enclosure failure.
- Remove protection gradually.
- Load or commission only after documented acceptance.
Frequently Asked Questions
Can cold-weather non-shrink grouting proceed below freezing?
Only when the selected product, project specification and approved cold-weather procedure permit the work and the actual grout, substrate and curing environment can be kept within their required limits. A below-freezing outdoor forecast does not necessarily mean the enclosed work is below limits, but an enclosure without measurements is not proof of compliance.
Can I use very hot water to compensate for frozen bags?
No universal water temperature should be assumed. Excessively hot water can shorten working time, create inconsistent batches or exceed manufacturer limits. Condition the bags and choose water temperature to achieve the product’s specified fresh-grout temperature.
Should the concrete be pre-wet in winter?
Follow the product data sheet. Where saturated-surface-dry preparation is required, remove all standing water and prevent refreezing. Never leave an ice film beneath the grout.
How long must the enclosure remain heated?
Until the product- and project-specific curing or strength requirement has been met, with records to support release. Air temperature, elapsed hours or one generic compressive-strength number cannot answer every job.
Is an ASTM C1107 designation enough for winter use?
No. ASTM C1107/C1107M addresses performance requirements for packaged hydraulic-cement grout. Cold-weather non-shrink grouting still needs product-specific temperature, mixing, placement and curing controls.
Make the Winter Pour Measurable
Reliable cold-weather non-shrink grouting is a controlled process: select the right material, establish an enclosure, condition every component, verify clean frost-free surfaces, place continuously, protect the grout and document temperatures until release. The best method statement replaces assumptions with limits, measurements and named responsibilities.
Explore our grouting and construction-material range or contact QD Materials with your grout-space dimensions, expected temperature range, strength requirement and application details. We can help identify the information needed for product selection and a project-specific installation review.
References
- American Concrete Institute, ACI 306R-16: Guide to Cold Weather Concreting — preview.
- ASTM International, ASTM C1107/C1107M-26: Standard Specification for Packaged Dry, Hydraulic-Cement Grout (Nonshrink).
- OSHA, 29 CFR 1926.154 — Temporary heating devices.
- OSHA, Winter weather and carbon monoxide hazards.
- Sika Corporation, SikaGrout cementitious grouts — cold-weather application bulletin.
- Sika Corporation, SikaGrout-4316 product data.